We have quite a few users reporting a problem in Microsoft Outlook 2016: when attaching a file on DriveHQ WebDAV cloud drive, the file is attached as a web link instead of a copy.
The problem seems to affect all WebDAV cloud drives (not only DriveHQ's). Microsoft Outlook 2016 automatically changes the attached files to web links, and this default option cannot be changed. It is a much-hated feature among Office 365 and Windows 10 users. (Please read user comments in the official Outlook user voice page:
https://outlook.uservoice.com/forums/322590-outlook-2016-for-windows/suggestions/13221879-option-of-attach-as-copy-to-be-set-as-default-op )
The good news is: the problem appears to be mostly resolved with the recent Windows 10 Creators Update. You can find your Windows 10 version info in the Settings as shown below:
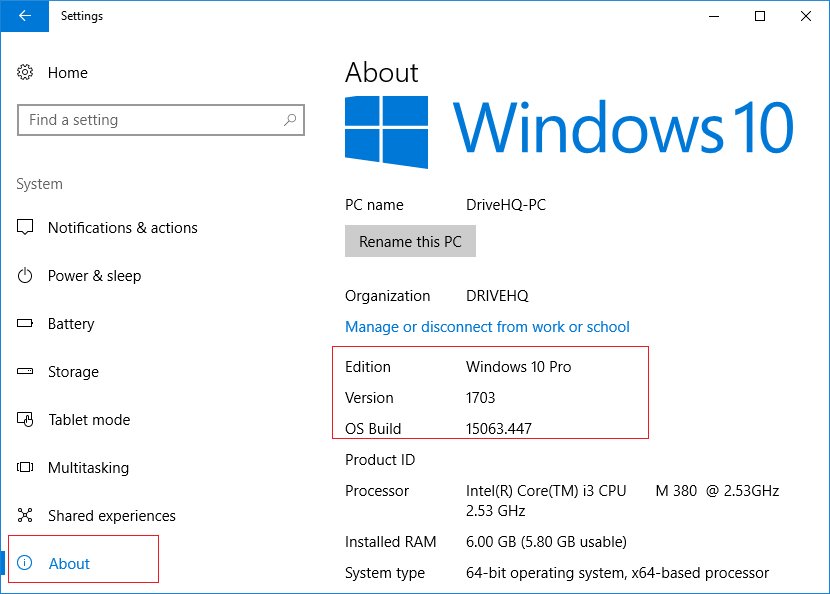
As of now, the latest version is 1703. In our testing, this version always displays the following dialog and let users choose "Share as OneDrive Link" or "Attach as copy". So please click "Attach as copy".
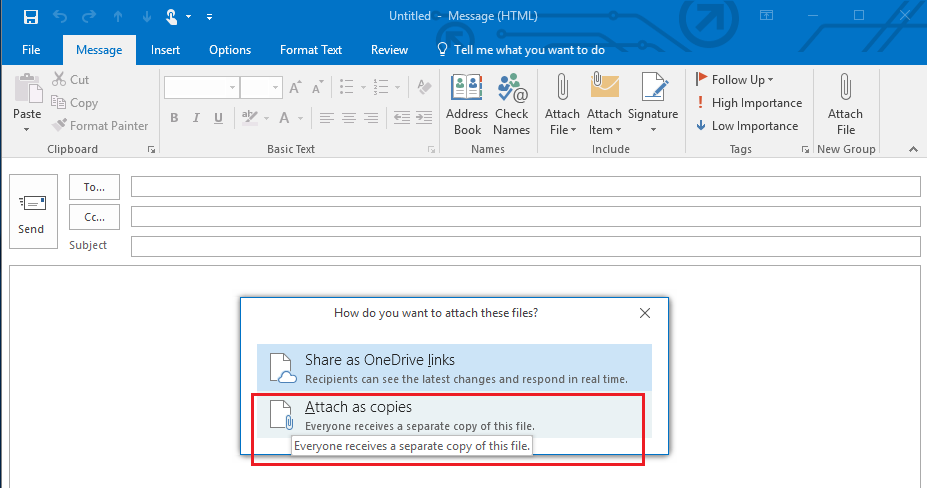
If you indeed need to share files, DriveHQ has a better file sharing solution. Please visit our features page for more detailed info.
(If you don't see this dialog, you might want to disable or uninstall Microsoft OneDrive. The problem is caused by OneDrive's integration with Outlook 2016. )
If you cannot upgrade your Windows, or if you don't want the above dialog, we have a few other options:
Method 1: Drag & Drop from File Explorer, or Copy & Paste from File Explorer
Instead of clicking the Attach File button, you can click the File Explorer icon in the Windows Task bar (at the bottom), locate the files in the cloud drive that you want to attach, then drag and drop the files into your new email. See the screenshot below:
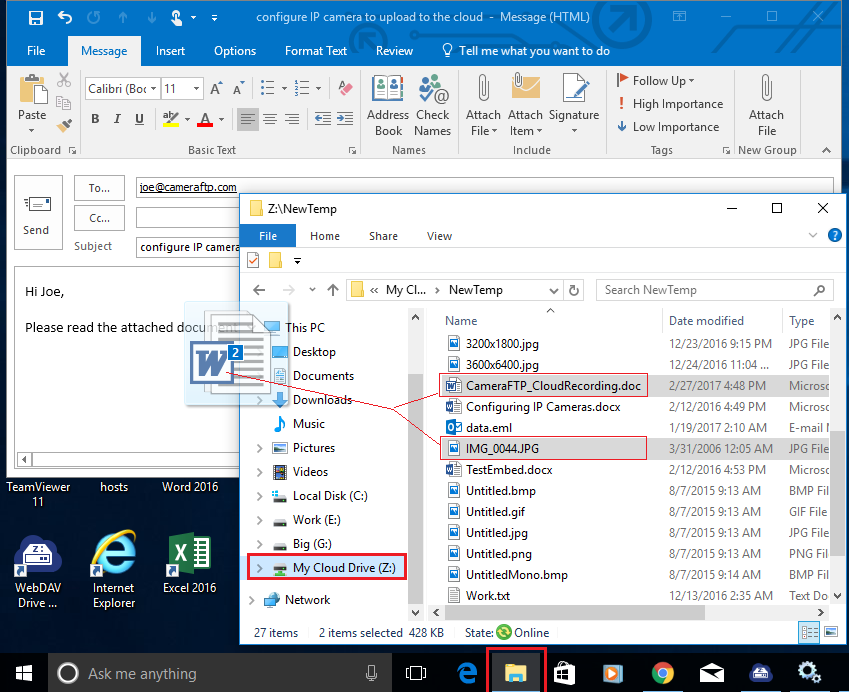
You can also select the files and click Copy (CTRL-C) in File Explorer, then click Paste (CTRL-V) in your new email to attach the files.
Method 2: Use Copy & Paste after clicking "Attach File"
You can click the regular "Attach File" button, it will open a window for you to browse files. Select the files to attach first; then instead of clicking the Insert button, you can right click on the selected files and select Copy. See the screenshot below:
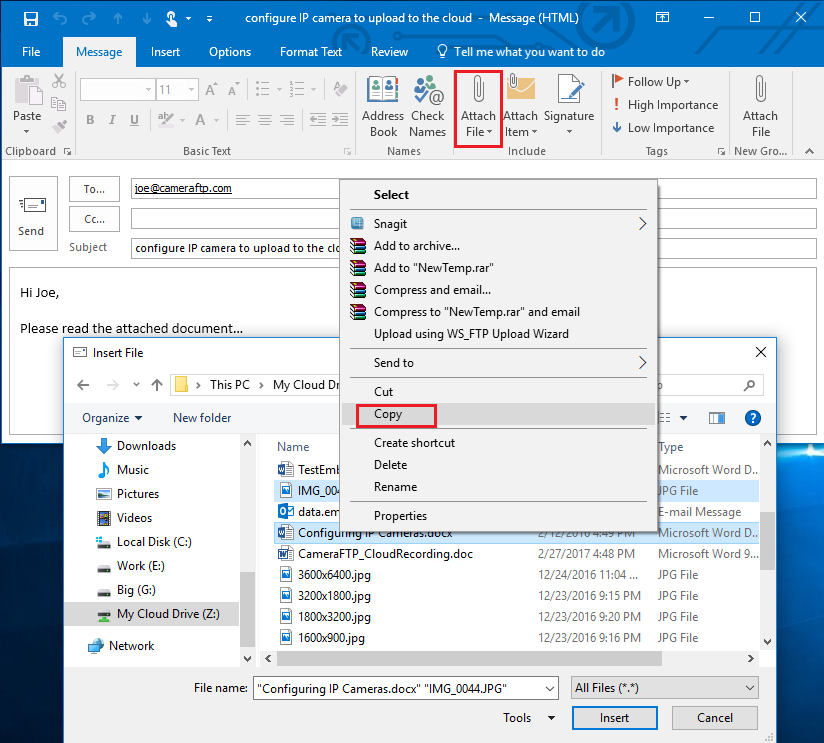
After that, you can click Cancel to close the "Browse File" dialog. In your new email body, you can paste the two selected files and they will be attached as copy.
Method 3: Use the classic Attach File button
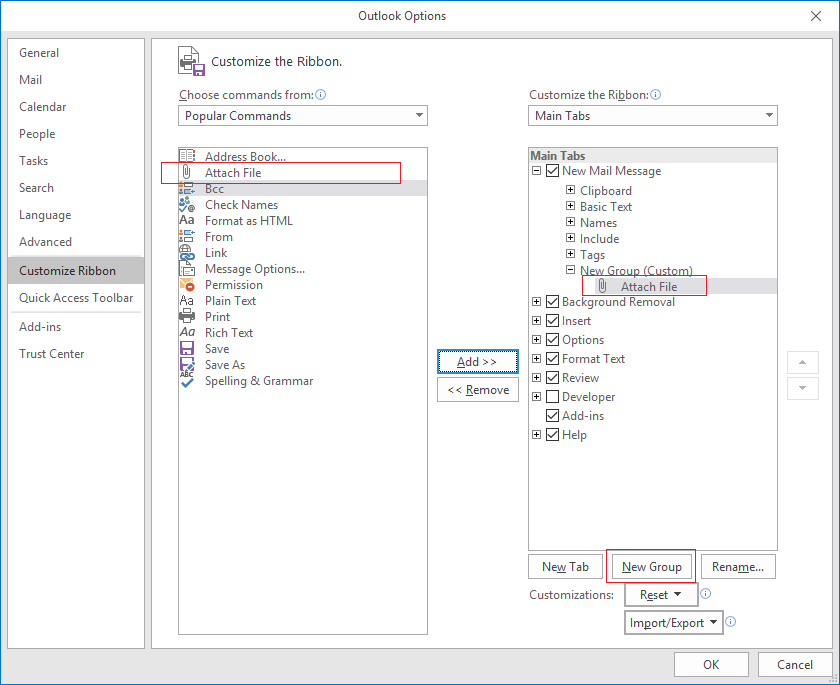
Interestingly, Microsoft kept a classic Attach File button, which will always attach files as copy. It is not displayed by default, but you can change the option (once) to display it. To do so, from your new email window, click File -> Options -> Customize Ribbon, select Attach File in the left, then select New Mail Message and click "New Group"; select the New Group, then click "Add >>" as shown in the screenshot below:
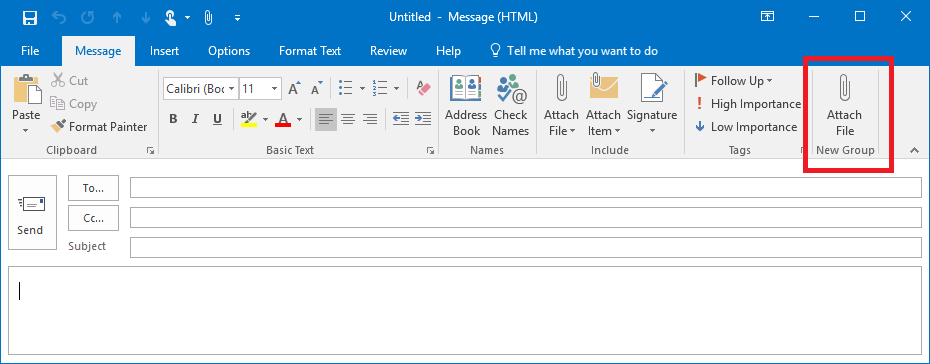
Click Ok to close the window. Now you will see a new Attach File button as shown below. While it looks the same, if you click it, it will always attach files as copy.
--------------
Office 2016 has mixed other (e.g.: DriveHQ's) cloud drives with OneDrive. A correct implementation should offer "Attach as OneDrive link" only to files on OneDrive. Anyway, most users don't like "Attach files as web link", they just want to keep emails simple and straight-forward. The Microsoft approach has one main issue: what if the recipient does not use OneDrive or is on a device with no OneDrive? Moreover, many organizations block Internet access to consumer cloud storage websites.
If users want to email files as regular attachment, then let them do so. If they want to share files in the Cloud, they can use other cloud file sharing / collaboration solutions. We hope the above solutions are helpful to you.